Want to speed up or secure your internet browsing experience? Try changing your Domain Name System (DNS) settings on Windows to point to Google’s servers with these simple steps:
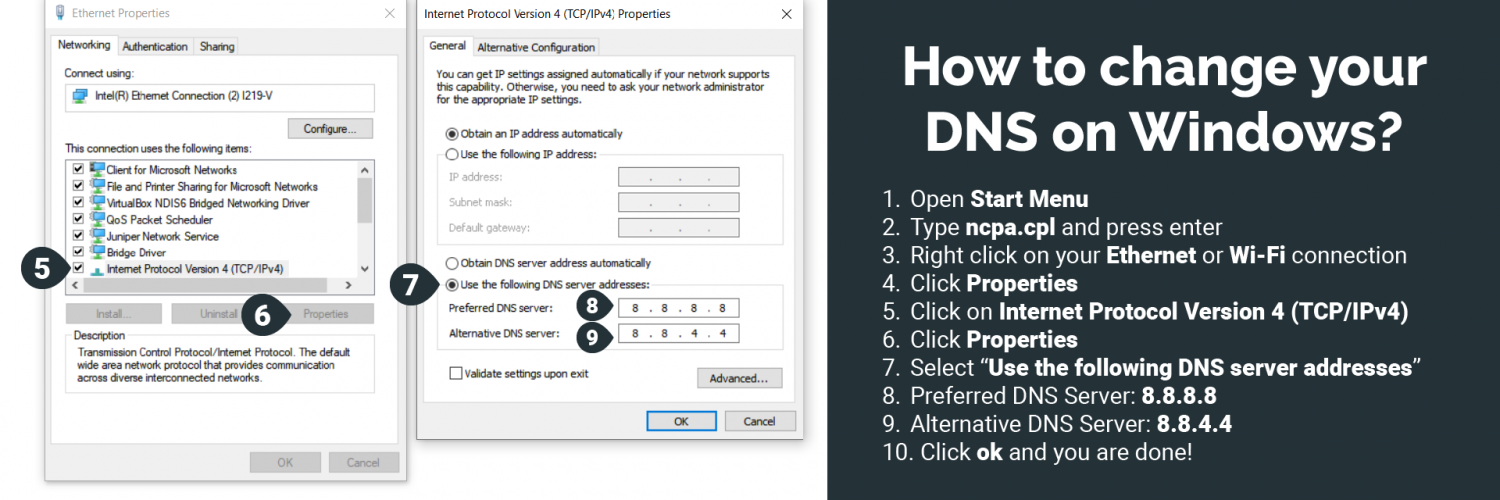
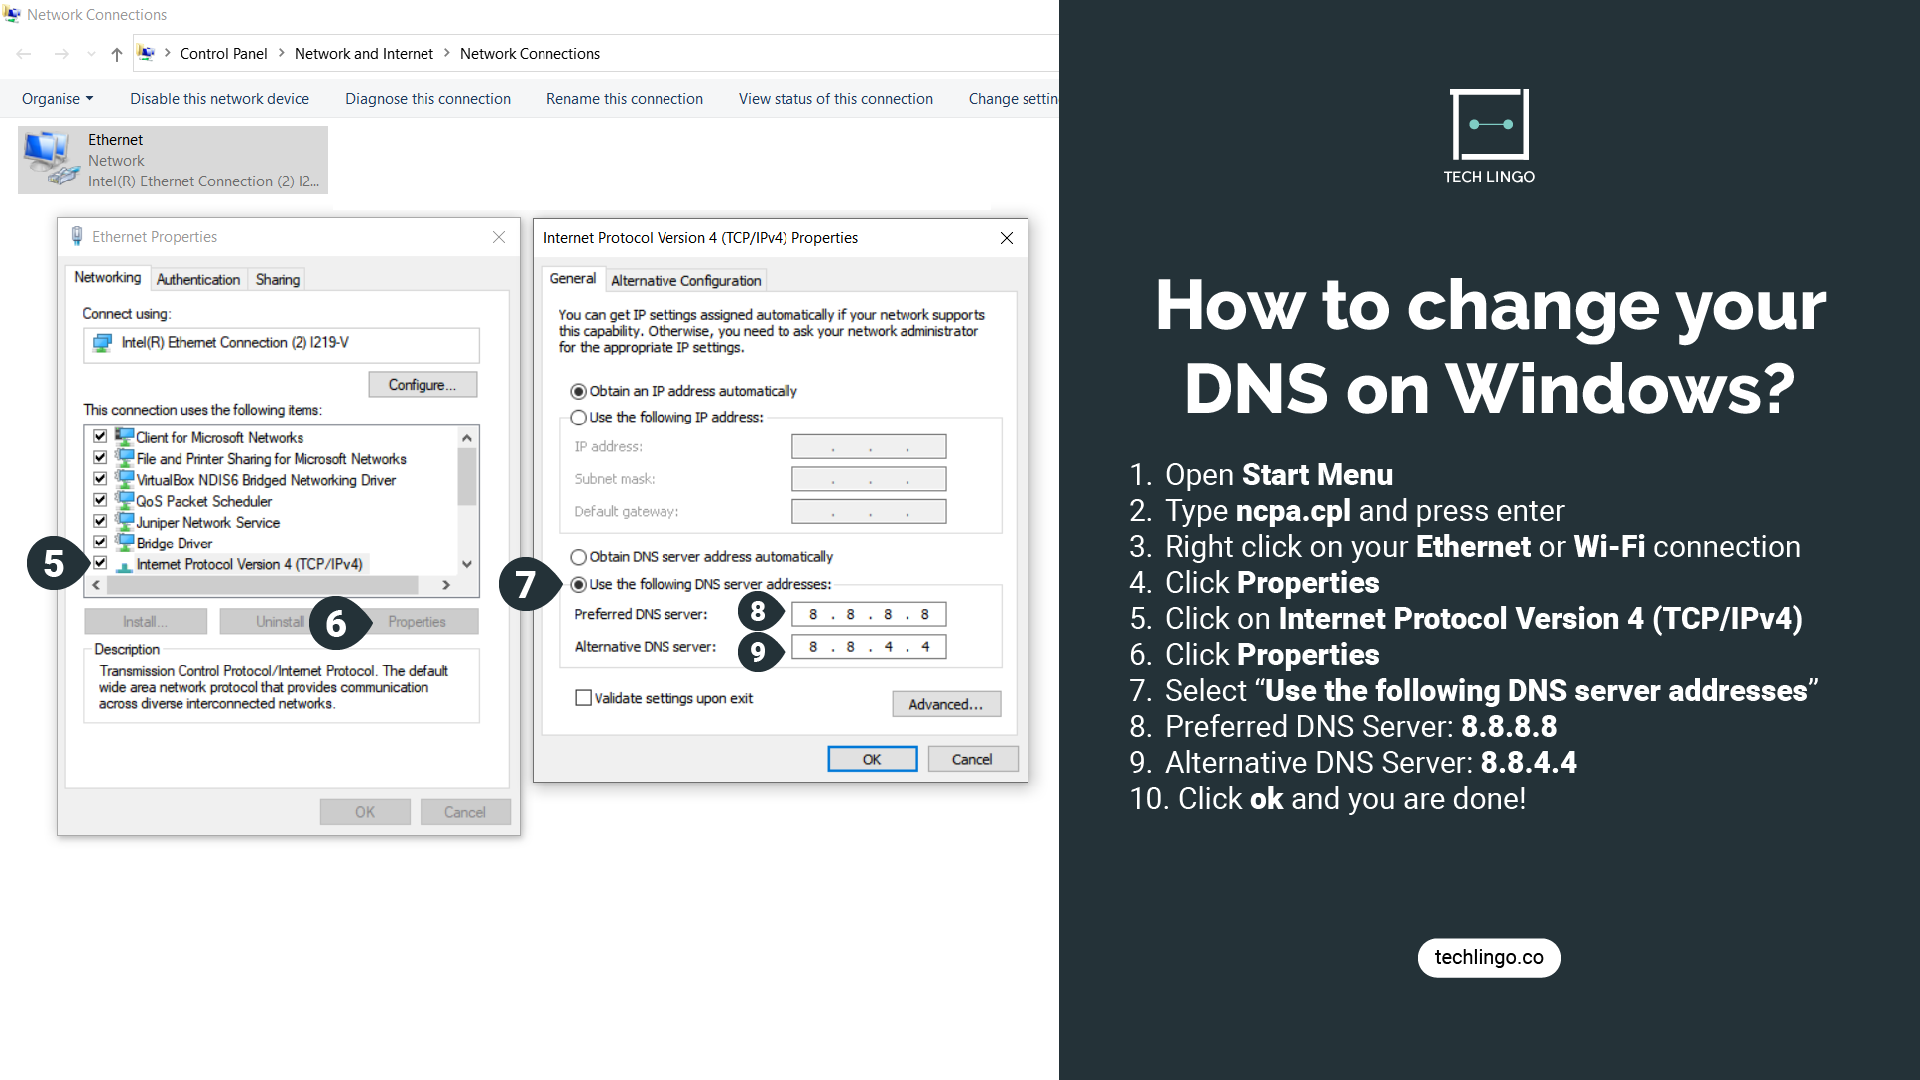
- Open Start Menu
- Type ncpa.cpl and press enter
- Right-click on the Ethernet or Wi-Fi connection that you are using
- Click Properties
- Click on Internet Protocol Version 4 (TCP/IPv4)
- Click Properties
- Select “Use the following DNS server addresses”
- Preferred DNS Server:
8.8.8.8 - Alternative DNS Server:
8.8.4.4 - Click Ok and you are done!
Free Public DNS Servers
Google DNS
Primary: 8.8.8.8
Secondary: 8.8.4.4
Cloudflare DNS
Primary: 1.1.1.1
Secondary: 1.0.0.1
OpenDNS
Primary: 208.67.222.222
Secondary: 208.67.220.220
Why change your DNS?
The Domain Name System (DNS) is an important protocol of the web’s infrastructure that is responsible for resolving domain names (e.g. www.google.com) to point to a specific IP address; akin to a store directory that provides you with the unit number of a store name.
Having a fast and reliable DNS provider can potentially increase your internet browsing experience as a website may often require multiple DNS queries to finish loading all content on the page.
Bypass censorship or filtering
Websites can also be blocked or censored by the default DNS servers provided by your Internet Server Provider (ISP) in line with local laws and regulations. Changing your DNS servers can reroute your browser requests to public servers that are “uncensored”.
🤓 Like what you read?
Stay updated by following us on Telegram, Facebook, Instagram or on our YouTube channel.